Pumpkin Construction Zone: Speech Therapy in Progress

Sunday, October 2, 2016 1 comment
Bit.ly/PumpkinConstruction

This pumpkin activity is a favorite among my students every year. The look on their faces is priceless as I pull out a pumpkin, some golf tees and a rubber mallet. Yup, I have their interest alright! What is this madness you ask? Well, we aren't smashing pumpkins, that is for sure! Let's reserve the Smashing Pumpkins for our listening enjoyment as we unwind on a relaxing fall evening at the fire pit.


I have students select a target word/task prior to hammering a golf tee into a pumpkin. You can use a toy hammer or purchase a rubber mallet from your local dollar store. Students targeting articulation then say their target sound each time they pound the golf tee. It assists in pairing articulation with a motor movement in a fun, engaging way. I use my Articulation Speech Sticks to elicit target sounds and Sight Word Sticks to target various language tasks, however you can use your own task cards as well.


Students spin the spinner to determine whether they will hammer a golf tee into the pumpkin or remove one (using pliers or their fingers).

 bit.ly/PumpkinConstruction

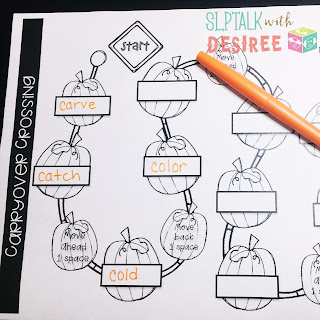
As an added bonus, this Pumpkin Construction Free Activity Companion bridges the gap between what happens within you therapy session and the home environment by providing a carryover game activity that students can play at home. Each student writes the word or target vocabulary he/she practiced on an empty space on their game board after each turn. They can then use the completed game board to practice at home!


 bit.ly/PumpkinConstruction

So, what do you say? Are you ready to put on your Pumpkin Construction hat and get to work?

Warm Wishes for a Successful Therapy Session, 
Desiree

Back to School Linky Party

Monday, August 1, 2016 1 comment

I am pairing up with Jenna from the Speech Room News for her Linky Party to celebrate the Best Year Ever Sale on Teachers Pay Teachers!

It's almost that time for me... I "officially" go back in 7 days but I'll be there tomorrow to get ready for all of those fresh faces that will fill my room! I am still with the same district but starting at a new school this year. It is bittersweet because I LOVE where I am coming from but love where I am going too. There is certainly a huge part of my heart that will miss my familiar faces dearly but I have no doubt that I will love my new friends as well (our hearts just grow and grow, don't they?). The school that I am going to be at this year is in an urban low socioeconomic area with a significant amount of English Language Learners.  What does that mean to me? Well, in creating new resources, it was imperative for me to include visuals in every way I could. Here are a few of the resources that I created or revised with this next year in mind. One of the best parts is that they are all on sale, along with the rest of my store for Teachers Pay Teachers Best Year Ever Sale 8/1-8/2/16! Remember to enter promo code: BESTDAY to earn 28% off.

One such resource is my Cup Stacking Alphabet Sound Edition. You know those ball popper toys that our students all love, love, love? This is the perfect companion for them, available in both color and black & white. Instead of just incorporating commonly misarticulated sounds, I incorporated every letter of the alphabet at the word and sentence level so that classroom teachers could utilize it as well. {Always, always, always have carry over in mind!} Students can also use ping pong balls, go bowling or (I'll huff, and I'll puff and I'll...) blow the cups down. It is a very easy prep (just prep one set of cups!) activity that is applicable across many goals. Vocabulary goals? Pick a letter and the student uses the words in a sentence, describes the picture, etc. Did I mention that every letter board incorporates one sight word as well? Here are some photos in action.

 Cup Stacking: Alphabet Sound Edition


My next excitement comes from a material that has been a favorite in my therapy room for over 10 years but is receiving a facelift to update images and expand to include more vocabulary. My Articulation Sticks evolved many years ago when presenting Innovative Speech Therapy Ideas Part Part III at the Speech Symposium in which I added a Make & Take portion to my presentation. A Make & Take for a group of 100+ SLPs would have to be 1) cost effective (aka cheap) and easy to make. Articulation sticks have been a great, versatile addition to my therapy room and nice break from the traditional task cards because you can take them on the go or get up and move with them (without playing 52 card pickup). My Growing Articulation Speech Bundle contains 140 target words with visuals for each phoneme (70 initial & 70 final position).  Look for it to continue to expand and keep your eye out for Language Sticks, coming soon.

 Articulation Sticks


Another resource that was valuable in my therapy room last year and I plan to continue to utilize this year is my Sight Word Tangrams pack. The tangrams are a great way to incorporate the curriculum with both reading (sight words) and math (geometry) standards addressed during a hands on activity. The tangrams are sorted by phoneme and pair a visual with each sight word. I can easily access the full color tangrams on my iPad (easy, no print) or use my printed minimal color version. There are also data sheets notebooks that are perfect if you would like the classroom teacher to use them as an RTI activity and easily track data.

 Sight Word Tangrams


There are so many materials in my cart as well. Here are some of the goodies that I can't wait to add to my therapy resources!

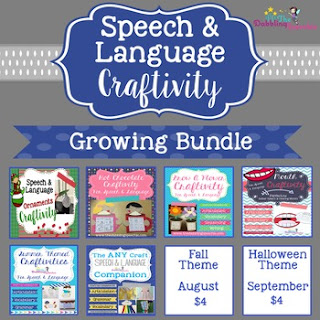
I love to use hands on activities and incorporate movement in my therapy sessions. The hands on Craftivities that the Dabbling Speech offers are going to be the perfect addition! I used her mouth creativity in the spring with my students and they LOVED it! I love how versatile her craftivities are for mixed groups.  Plus, they include visuals! Woot! Woot!

 Creativity Bundle

Next, I have Sparklle SLP's Therapy Organizer Materials for a New Year in my cart. I love starting the year off on the right foot with an organizational system in place for not only myself, but my students as well! I look forward to getting to know my students while we also familiarize ourselves with their goals. After all, that is the real reason why we are all there isn't it?


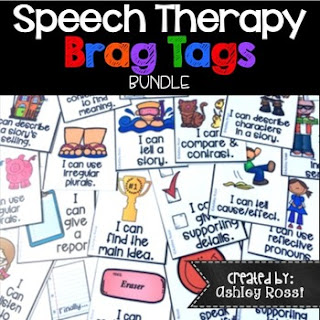
Ashley Rossi's Speech Brag Tag Bundle is just as cute as it can be, isn't it? I love how they also offer specific feedback in a way that builds metacognition skills. I am excited to use them to reward student growth and effort in a motivating (yet prize free box) way.

 Speech Therapy Brag Tags


Well, my shopping has likely only just begun. My cart is overflowing and I look forward to adding some more. I love the bargain that the Back to School sale offers with 28% off. It is invigorating when you find a great deal, it saves you time and increases your skill set as a therapist. Bring it on 2016-17. You will be my best year yet.

DIY Spin the Wheel

Sunday, July 17, 2016 1 comment
Have you ever watched how fascinated children are with spinning the wheel at a carnival? Okay, admit it, it is pretty fun for you too, isn't it? If not, I know I am guilty as charged...  I have a funny feeling that some of you may be too though.  Those spinner games don't seem to be off by their lonesome in casinos after all, do they?  I am certainly not advocating for any type of gambling with your students but spinners in general are awesome motivators to bring into your therapy room or classroom and I am a fan of getting work done in a way that motivates my students to use every ounce of time that we have. Enough with the small talk, you are probably wondering how I made this, aren't you?


Here is what you will need...

SPIN THE WHEEL:
2 pieces of plywood (mine were each 12" x 24")
2 hinges
A Lazy Susan (I bought mine from IKEA)
Liquid Nails (or another strong adhesive) to adhere the Lazy Susan to the plywood
Chalkboard paint (to paint the Lazy Susan)
Craft Paint (if you want to paint your plywood)
Nails for the perimeter of the Lazy Susan wheel (Note: I have since switched out the nails to plastic tipped thumb tacks- I like them much better)
1 Zip Tie
1 small wooden dowel

THE CHALLENGE BOARD (this is optional, but I like to use every space I can!):
Spray painted washers in varying sizes
Screw in hooks
Chalkboard Labels


How to make the wheel:

1. Paint the Lazy Susan with chalkboard paint and allow it to dry.

2. Attach hinges to the top of the two pieces of plywood so that your wheel can be free standing.  I do recommend holding it while students spin the wheel though... they can get pretty aggressive in their spins at times.

3. Place nails or thumbtacks around the edge of the top of the Lazy Susan. I initially used nails when I made mine but have since replaced the nails with thumb tacks. I would recommend the thumb tacks because they work quite well and aren't sharp while spinning. You may need to use a small drill bit or get a hole started with a nail to place the thumb tacks in. I used a little dab of hot glue to make sure that they stayed in place.

3. Using Liquid Nails, attach the bottom of the Lazy Susan to your hinged plywood.

4. Attach the small dowel to the plywood approximately an inch from the Lazy Susan wheel by drilling a small hole and using wood glue.  Then attach a zip tow to the dowel. You may need to trim down your zip tie after it is attached. As the wheel spins around, the zip tie runs along the thumb tacks and will act as the pointer.


If you would like to add the challenge board to the other side, simply space out the screw in hooks along your board and attach chalkboard labels. I imagine that you could also use Washi tape to write the names. Use spray painted washers in varying sizes to then track homework completed, goals met, stations completed, whatever you little heart desires.


Here I was using the wheel to spice up a progress monitoring activity.  You can find this Language Progress Monitoring Tool by Natalie Snyders here.


The wheel is one of the most popular tools in my therapy room.  The beauty of the chalkboard paint is that you can change its use at a moment's notice. I use it to decipher between student turns, wh- questions, descriptive attributes, randomly assigned points, prizes, actions, comprehension questions, categories, and so on. This is where you can really let your creative juices flow!

I hope that this tutorial was helpful for you. Please comment below with any additional ideas or questions that you may have. Thanks for stopping by!

Room Decor (and Freebie)

Sunday, July 3, 2016 2 comments
Summer is in full swing but it won't be long until we are welcoming those new little loves into our therapy room and hearts. I love to create a warm environment for my students, a living room of sorts. A couple years ago, I created a Photo Collage with my own crew to display in my room. All you need is a large box (I used a left over wardrobe box from moving), a picture frame with a piece of black paper inside (we will add the words later) and the free (where have you been all my life) website PicMonkey. Here is the final product but I'll show you the steps along the way, don't worry.

I had this printed on a banner at my local office supply store... super cute!


First, get yourself a box, rent some kids (or have some, whatever is easier ;) ), a frame and snap away.  Don't worry about what look you are going for, just play around and have fun. My room was blue and green so we wore those colors, but really anything will work. If you are anything like me, there will be PLENTY of out takes. I do recommend taking the photos on a flat surface. Don't worry about the background, we will crop that out later. I took mine on the grass but I would recommend the driveway/floor if you can... it is easier to crop out than random blades of grass.

Zoe even joined in on the fun!
Next, after enjoying a nice cold beverage, hop on your computer and go to the PicMonkey website. Choose Edit, then select the first photo to edit from your computer (you may have it saved on your computer, flash drive, photo card, etc.). You will edit each photo that you want in your collage individually first to crop out the background and add text to your frame.

Do not worry about the Log In part, I do it all without ever logging in.

Next, Crop your photo so that you mainly have only the box. Do not worry if it isn't perfect, it will all work out when the collage comes together because we will select brown as the background that will divide the photos in your collage.


Okay, now it is time to add some text. Select the Tt box, then select the font that you would like to use. Unless there is a crown next to the font, it is free to use (all of mine were). Type your text and change your font color to white (see the photo below).  Position the text within the frame and rotate it as needed. 

It will look like the text was there all along!
When you are finished editing your photo, make sure that you save it by clicking Save and select the name and where you want to save it on your computer. Edit your next photo by selecting Open to select your next photo. It will warn you that you will lose changes to your current photo, but as long as you have saved it already you are good to go!  Edit each photo that you would like to include in your collage the same way. Next, you will select Collage from the main PicMonkey page as shown below.


Select Layout icon, then select Square Deal. I chose the 9 square option. Once the squares are open, you can expand the collage to be wide and then it will take on a rectangular shape. To add your photos, select the Images icon (right above the Layout icon) and select photos from your computer (the same ones that you previously edited and saved). Drag each photo to the boxes that you would like them placed.


Next, you will change the background from white to match your box. This will make it look like the boxes are all stacked on top of one another. First, select the Paint Palette icon on the left, then select the Dropper symbol. Make sure that Background is selected (not Cell). This allows you to match the exact color of your box. You can change the spacing to your preferred sized, then Voila! Make sure to SAVE your collage. You now have a fun, personalized photo that you can display in your therapy room or home. I printed mine on banner paper at my local office supply store. With the sale that they offered, it cost me about $14.99. You can also upload it to print as a poster or banner on Vistaprint.


Now that you have your poster all set up, are you looking for an easy print and go addition to compliment  your speech room or classroom?  You can download a fun Alphabet Banner (including digraphs and er) in either a Bright or Neutral version to compliment your decor while providing photo cues and spelling patterns that are compatible with Orton Gillingham spelling instruction. My students relate with the child friendly mouth photos that reflect correct sound production by their own peer group.
Click the Photo to Access the Bright Version of the Alphabet Sound Banner

Click the Photo to Access the Neutral Version of the Alphabet Sound Banner


You can download also this free Speech Banner here to welcome your students into your room or create a hallway display.


Thanks for stopping by.  Have fun decorating your home away from home!


Investing in Your Students

Monday, June 27, 2016 No comments
I am a huge advocate for investing in authentic interactions with your students that are individualized to their personal traits and characteristics. Even as an adult, do you find that you work harder for those who are personally vested in your success? I know I sure do. Even as I enter Professional Development, I find that I learn best from presenters who I feel are truly vested and are there for "the right reasons" (Sorry, I couldn't resist. Any Bachelor/Bachelorette fans out there?). Their authenticity in imparting their knowledge to grow me as a therapist energizes me (and yes, they have the evidence to back their practice).

The same goes for our own students/clients/kids. Taking time to invest in my students is always time well spent.  Does it break my heart to learn of some of the trials or experiences that they have encountered? Absolutely. The path may be far from easy at times; however, the payout is likely what brought us into this field in the first place...to make a difference. Learning about who my student is as a whole person makes me a more effective speech-language pathologist.  It often helps me determine possible functions of behavior and earns that buy in from students by making real world connections.

One of my favorite activities to do with my students each year is to create "I Am" poems.  Google it and you will come up with a plethora of templates. Through the years, I have adapted the questions that I ask and enter the student answers during our session in a template that I made using Word.

This is one of my all time favorite activities of the year!


When I have a group, I simply open up the template in numerous windows, saving it as the student's name.  I can then toggle between the student documents as they take turn answering the questions. The template is also printable which is convenient later in the year when the students may use them in an interview format to interview a peer for responses. Wow, that sure does cover an array of communication skills, does it not? Let's see... articulation in context, descriptive language, answering questions, asking questions, expressive vocabulary, identifying emotions, code switching, syntax, categorization, fluency, the list could go on for days. For some of our students with a severe phonological impairment or apraxia, we may be some of the only people that understand what they are saying, aside from their caregiver.  Imagine how wonderful it feels for them for someone to get to know the inner core of who they are as well as how much their teacher will appreciate the insight when they read the poem. It is life changing for some students, truly it is.
This is the template that I use.
Once the poem is completed, I take a close up photo of the student using my iPad, then email it to myself to insert into the word document. (Note: Photos that are taken on a white or neutral background work best). To insert the photo, you can either copy and paste it from your email or insert it my selecting Insert, then Photo, then the Saved Photo File that you Created.

You can resize your photo by dragging the corners of the photo.  Next, Right Click on the photo and select the Picture tab.  Under the Picture tab, select Washout under the Color option. I then adjust the Brightness to 65% and Contrast to 35% but that is not necessary if you would like your picture to be very light in the background.  Next, select the Layout tab (from the same menu option when you right clicked on the photo).  Under Layout, select Behind Text as your wrapping style and Center under the alignment and click Okay. Your student's photo should now appear lightly behind the text of their poem. You can adjust the size as you would like. I like the student photo to fill the page.

Now, all you have to do is print the poem! The poems create a beautiful display. They are make a nice gift or resource to give to parents at the student's IEP meeting. Parents often love them so much that they request extra copies.  No problem!  Simply save the Word document that you created when the student completed the poem as a pdf and email it to the parents! Voila!

Do you have a favorite activity that helps you get to know your students better? I would love to hear about it, after all we are better when we work together, right?  Drop it in the comments below!

Thank you for stopping by!